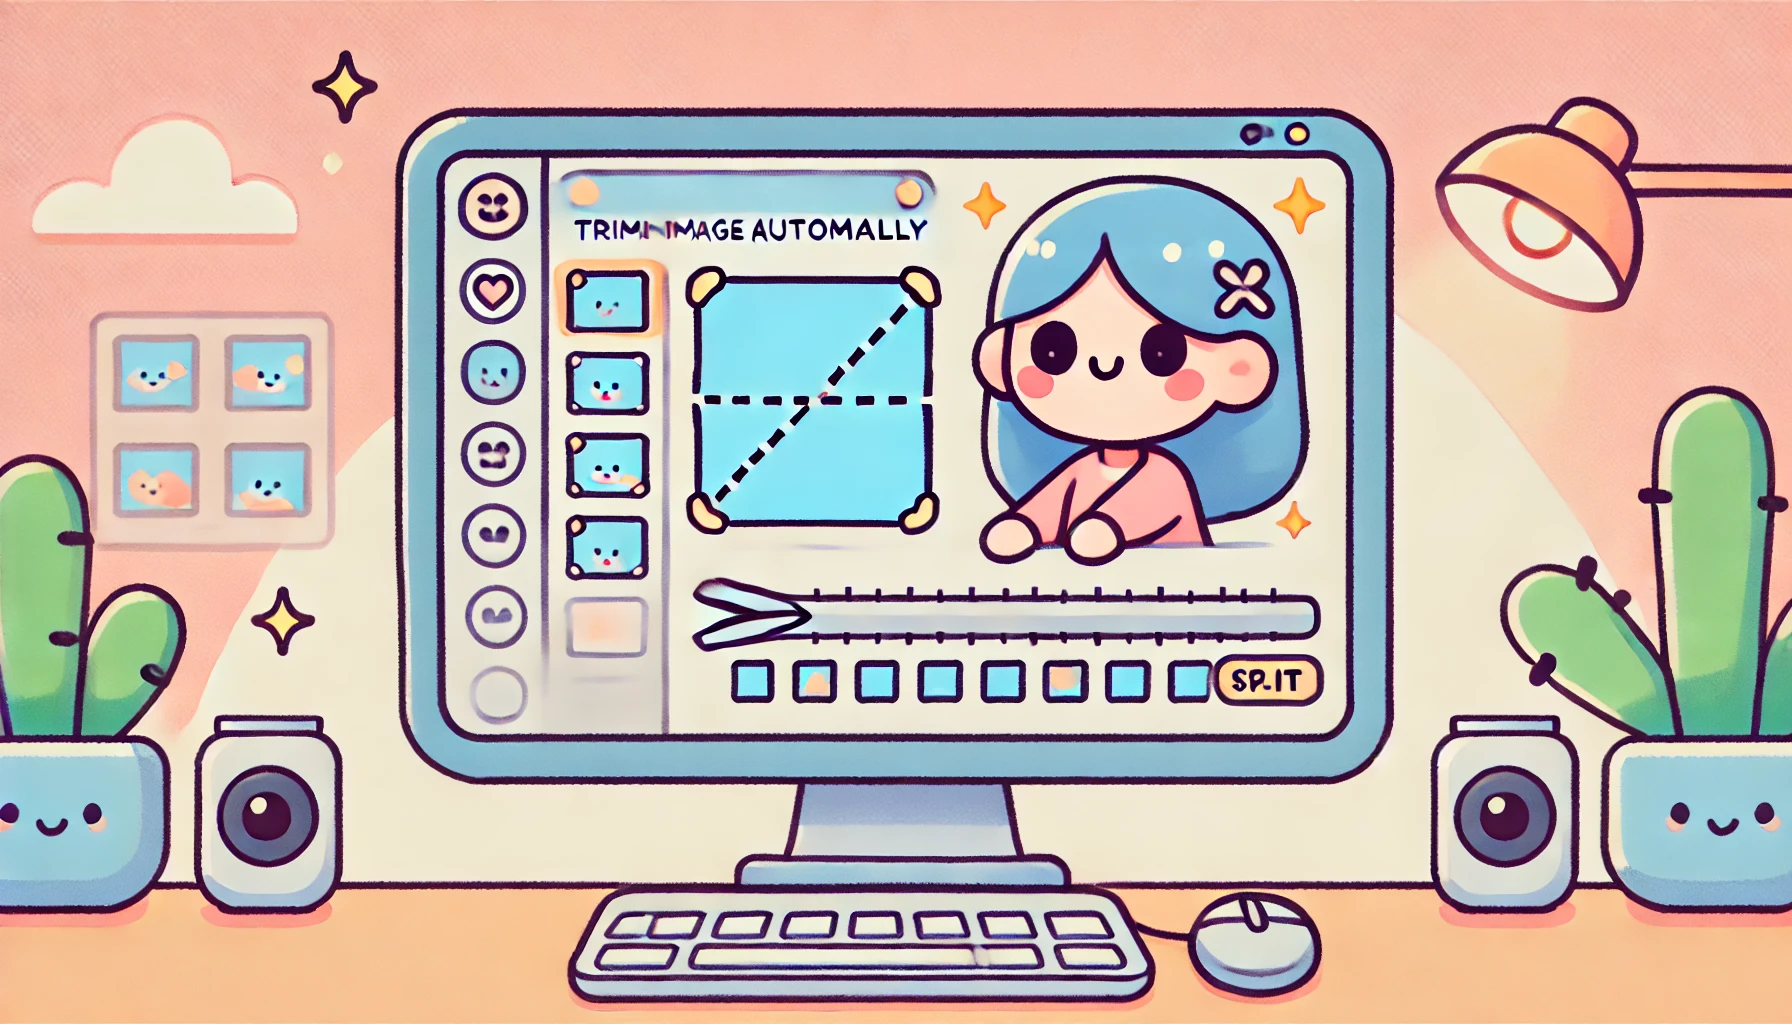
余白を自動トリミングできるアプリのご紹介
KAN YOSHIDA
株式会社アートジャンキー
Kritaをインストールするには、公式サイトからダウンロードを行います。
インストール手順は非常にシンプルです!
ダウンロードしたファイルを開き、Kritaをアプリケーションフォルダにドラッグ&ドロップするだけで完了です。

krita-ai-diffusionのプラグインはこちらのGitHubページから入手できます。
最新バージョン(例: Version 1.29.0)をダウンロードしましょう。
• ファイル名:krita_ai_diffusion-1.29.0.zip
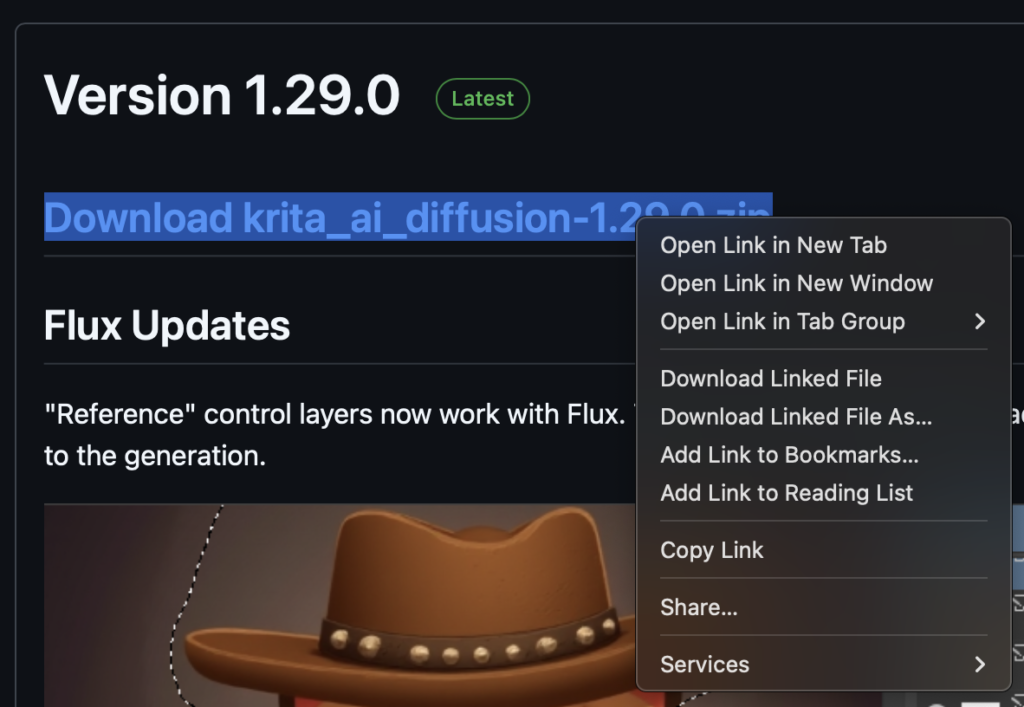
• ダウンロード方法:Controlキーを押しながらリンクをクリックし、「Download Linked File」を選択します。
Kritaを起動し、メニューから Tools > Scripts > Import Python Plugin from File を選択します。
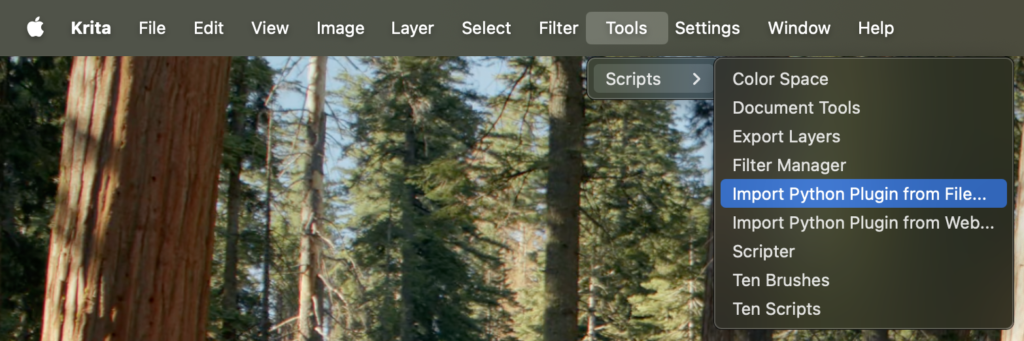
ダウンロードしたkrita_ai_diffusion-1.29.0.zipを選択してください。
Kritaを再起動し、新しいキャンバスを作成します(例: サイズ 500×500)。
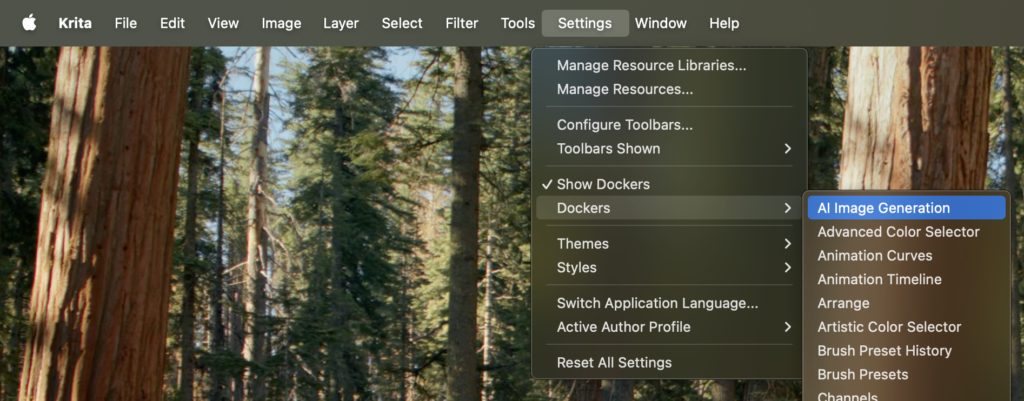
メニューバーの Settings > Dockers > AI Image Generation をクリックすると、画面右下にドッキングパネルが表示されます。
パネル内の「Configure」をクリックし、「Install」を選択してください。
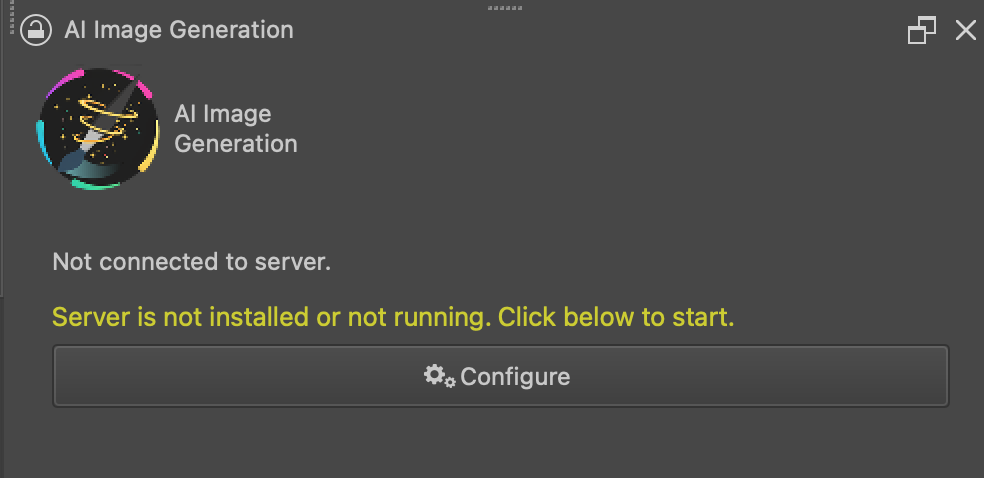
⚠️ 注意:インストールには約10GBの空き容量が必要です。
Mac環境では、インストール後に以下のエラーが表示される場合があります。

Server running – Connection error: Connection established, but the server is missing one or more custom node
このエラーを解決するには、次の手順を行ってください。
下記コマンドをターミナルで実行します。
cd "/Users/[Your Name]/Library/Application Support/krita/ai_diffusion/server"
※ [Your Name] は自分のユーザー名に置き換えてください。
問題の原因となるディレクトリを削除します。
rm -rf comfyui-tooling-nodes正しいファイルを再ダウンロードします。
git clone https://github.com/Acly/comfyui-tooling-nodesKritaを再起動後、右下の歯車アイコンをクリックして「Configure Image Diffusion」を開きます。
左メニューの「Connection」から一旦Server Runningを停止し、すべての項目をチェックして再インストールします。
最後に「Launch」をクリックしてサーバーを再起動してください。
これでMac環境でのエラーを解消し、生成AIを活用できるようになります!リアルタイム画像生成などの先進的な機能をぜひお楽しみください。
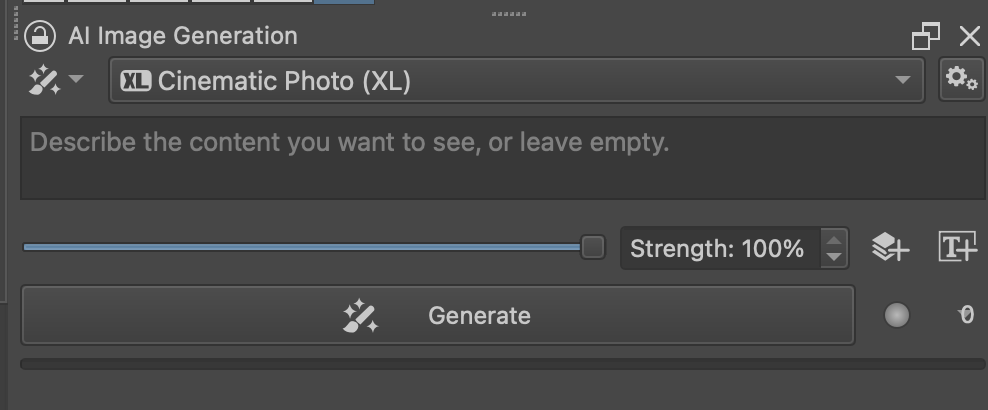
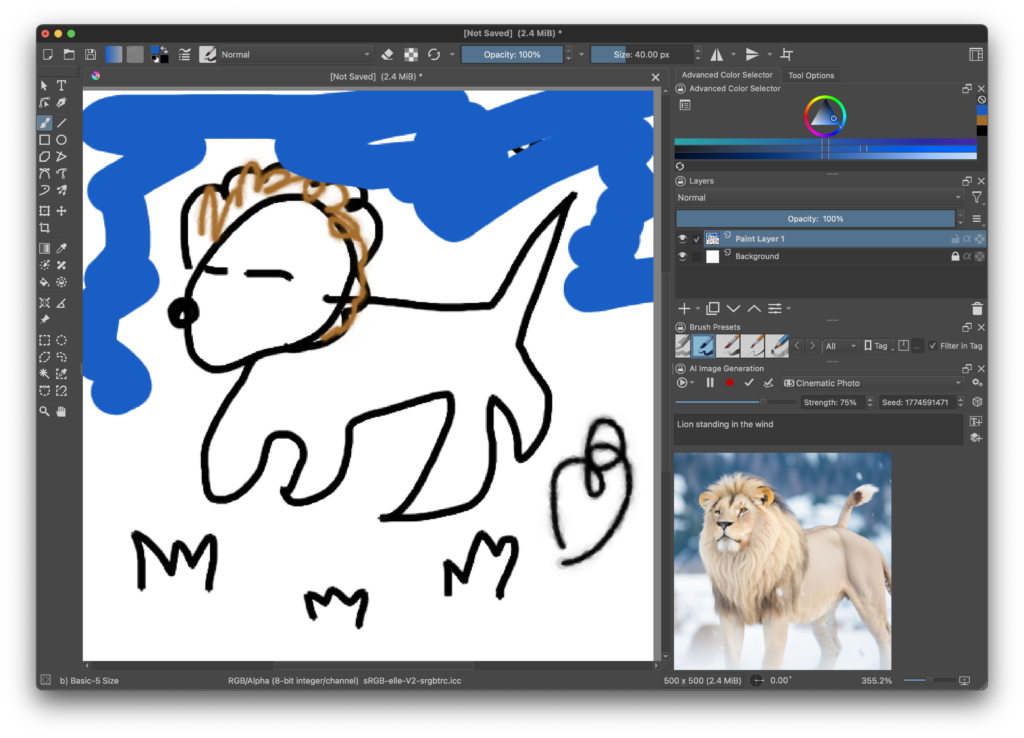
リアルタイム画像の参考です。左に絵を描くとAIが右下に書き直してくれます。面白いですね。
この手順を参考に、快適なAIライフをスタートさせましょう!
cd "/Users/[Your Name]/Library/Application Support/krita/ai_diffusion/server"rm -rf comfyui-tooling-nodes
git clone https://github.com/Acly/comfyui-tooling-nodesKrita を再起動し、ai_diffusion パネルから「Configure → Reinstall」実行